An aquaponic system combines growing fish and plants into one symbiotic system. You can turn your aquarium into an aquaponics system. Doing so can provide the following benefits:
- A filter for your aquarium water so you can do less water changes
- A way to grow edible plants
- Aeration for the water to keep your fish happy
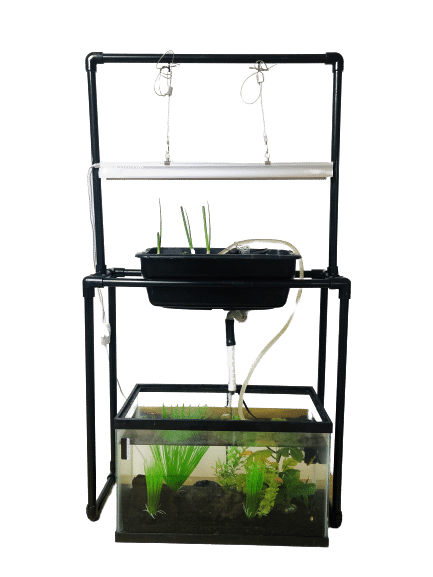
This tutorial will show you just how to turn your 10-gallon aquarium into an aquaponics system for under $50. You will learn to:
- Build a PVC to stand to hold your grow container and light.
- Install a siphon into your grow container
- Setup a pump to pump water from your fish tank to your grow container
- Install grow lights
Things You'll Need
1. Cut PVC to required lengths
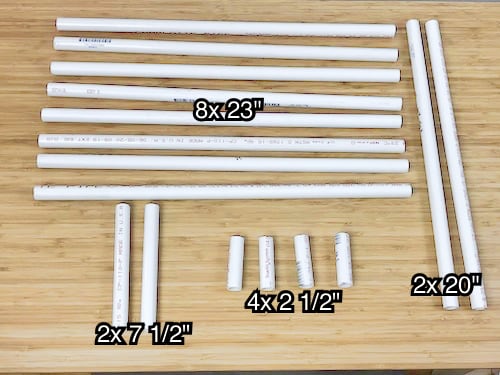
Start by gathering your supplies and cutting all of the PVC pipes to size. Use the measuring tape to measure the required lengths. Then, use the PVC pipe cutter to cut:
- ten 23″ long PVC pieces
- two 7 1/2″ long PVC pieces
- four 2 1/2″ long PVC pieces
- two 20″ long PVC pieces
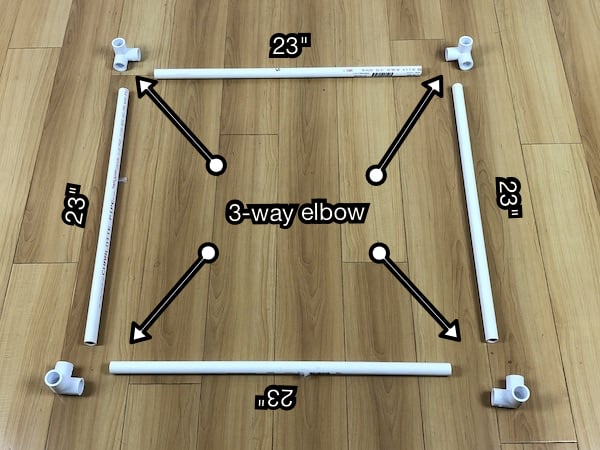
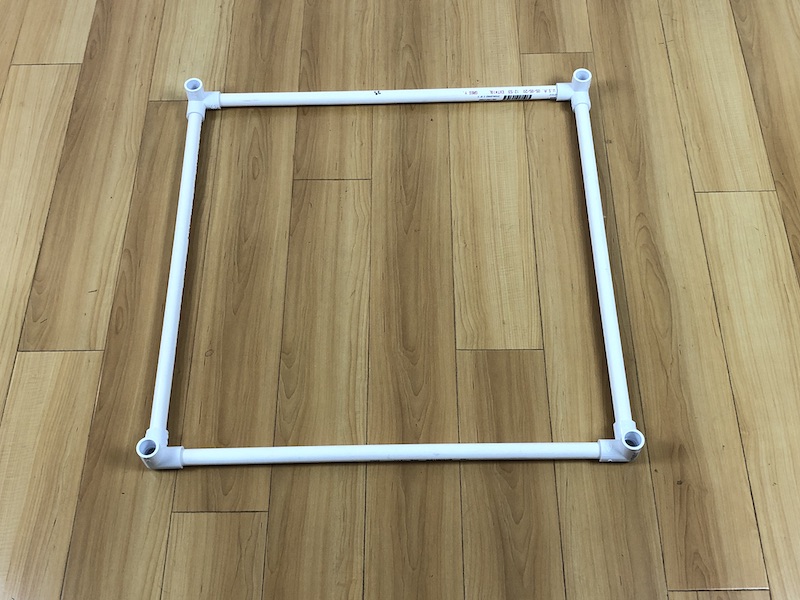
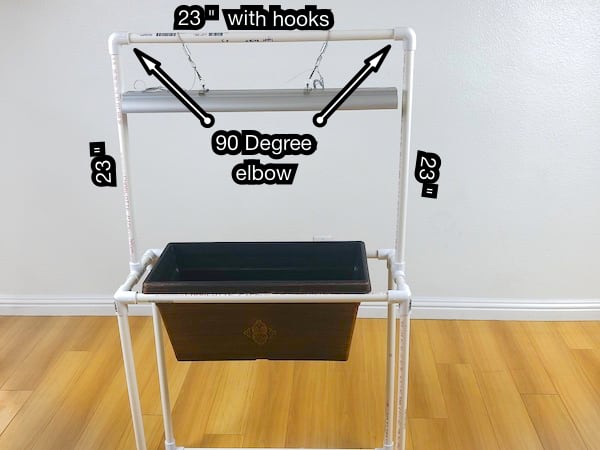
2. Assemble back side of the frame
Take one of the 3-way elbows and attach a 23-inch piece of PVC. Now, attach another pipe to the other size of the 3-way elbow. Add a 3-way elbow to the end of the second piece, making sure the 3-way elbows are facing each other. Continue adding pieces of PVC and 3-way elbows until a square is formed with 3-way elbows at the joints.
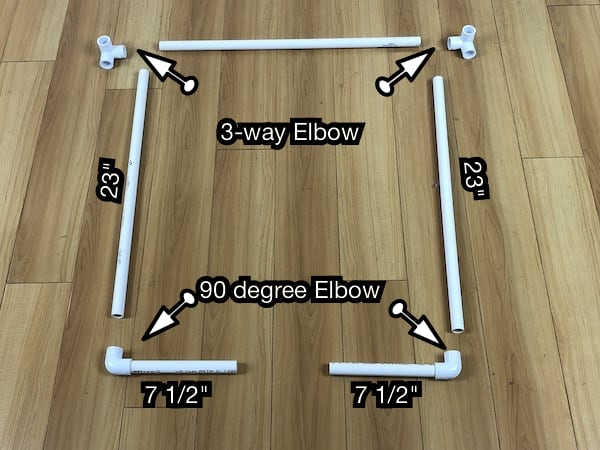
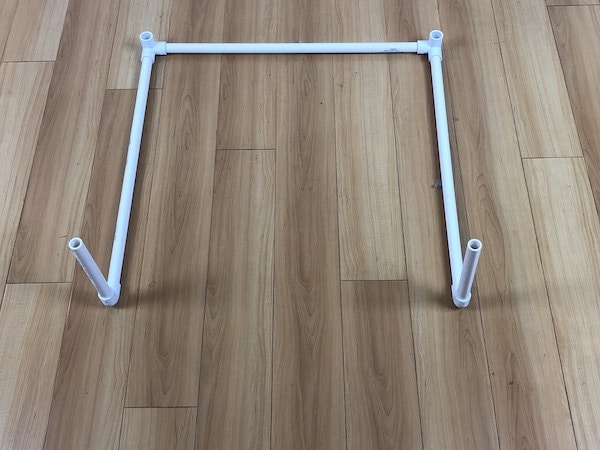
3. Assemble front size of frame
Take one 23-inch piece of PVC and attach a 3-way elbow to each end. Then, attach another 23 inch piece of PVC to the other side of each of the 3-way elbows. Connect the two 7 1/2 piece of PVC to two 90 degree elbows. Connect the open end of each 90 degree elbow to each open end of 23-inch piece of PVC. Make sure that the 90 degree elbow is pointed upward so that the 7 1/2 piece of PVC is pointed up.
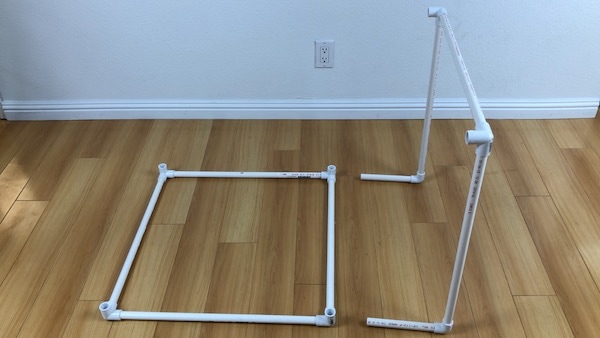
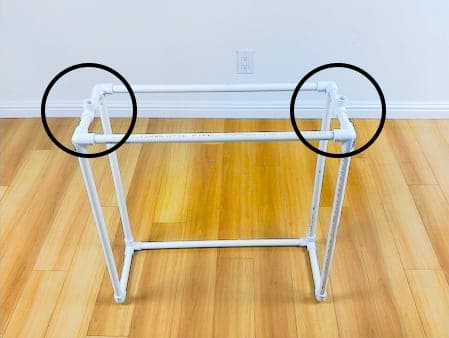
4. Join the two frame pieces (Back and Front)
Connect the 7 1/2" pieces of PVC from the back side piece with two 3-way elbow pieces on the front side piece. Once connected, make sure the base is level with the floor and not wobbly.
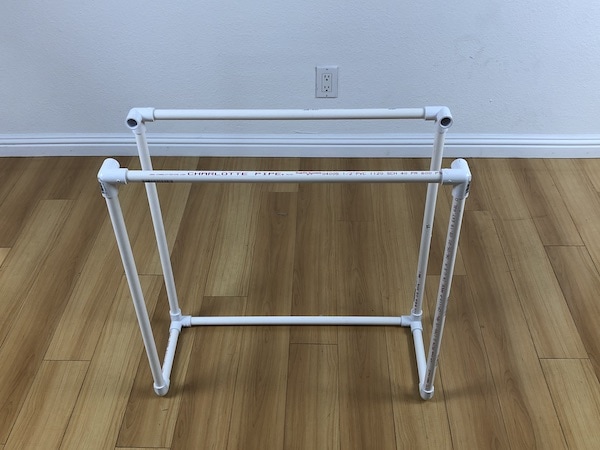
Tip
Once assembled, make sure that the base is level with the floor. If the base is not level, the frame will be wobbly.5. Add light stand connector to frame
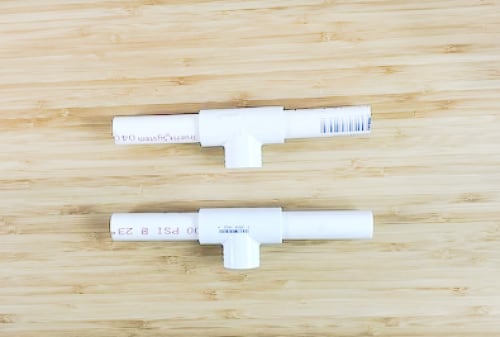
Take a 1/2" tee and insert 2 1/2 inch piece of PVC to each end. Take another 1/2" tee and again insert 2 1/2 inch piece of PVC to each end.
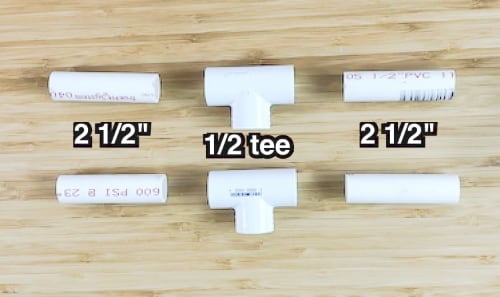
Join the light stand connector piece with the open 90 degree elbows in the stand.
Tip
Ensure that the tees are pointing up and not slanted.6. Install light stand
Take a 23" piece of PVC and measure and mark 7 inches from each end. Make sure that the marks are aligned. Then, using a drill with a 1/8" drill bit, drill a hole into each mark.
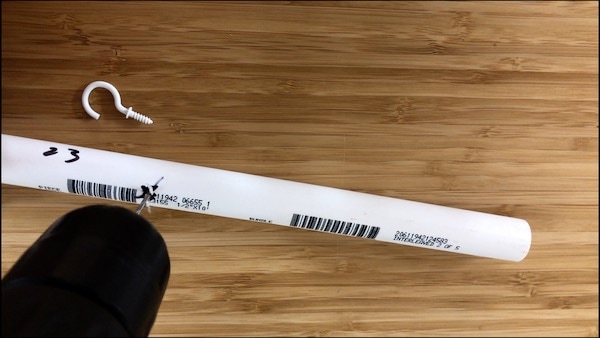
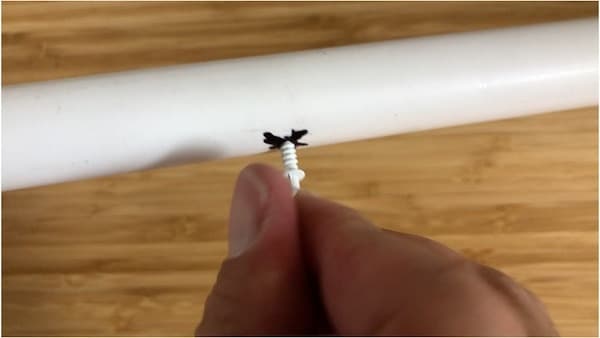
Take the screw hooks and twist them into each of the newly drilled holes in the 23" piece of PVC.
Take two 23" piece of PVC and insert them into the open end of each tee. Attach a 90 degree elbow to each of the 23" piece of PVC. Then, take the 23" piece of PVC with the attach screw hooks and connect the two 90 degree elbows to from the top of the light stand.
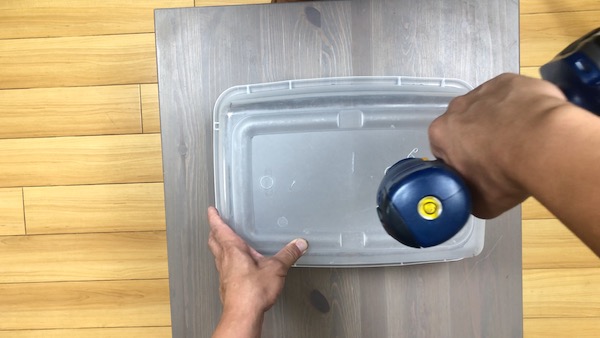
7. Install siphon into the grow tray
Turn the storage bin upside down. Using a drill and 7/8" drill bit, drill a hole into the bottom of the container.
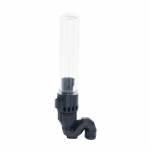
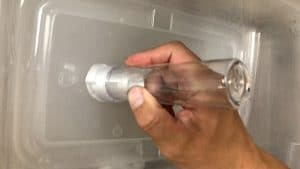
Unscrew the s-curve from the Justponics 4" bell siphon. Make sure the an o-ring is on the threaded connector piece of the siphon. Insert the top piece of the siphon from within the container into the drilled hole of the container . Screw back on the s-curve to the threaded connector piece of the siphon.
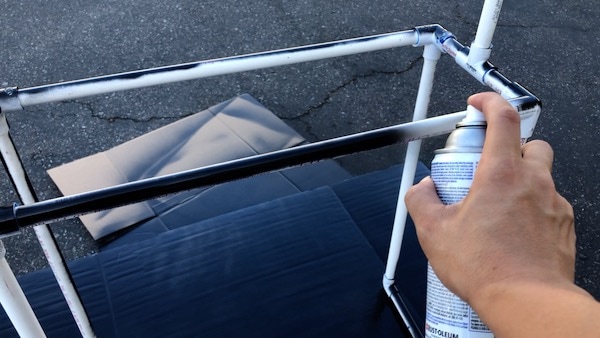
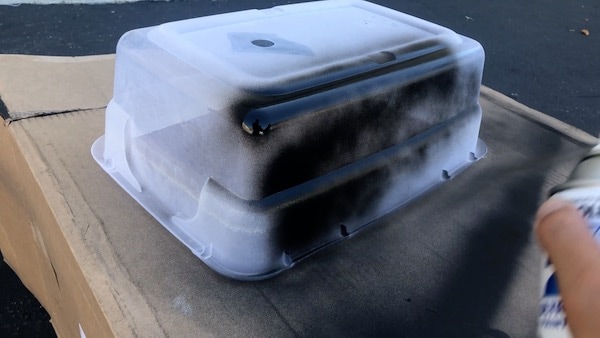
8. (Optional) Spray paint the frame and container
Take the can of black spray paint and coat the frame and outside of the container. Make sure to tape the drilled hole in the container from the inside to prevent spray paint from coating the inside of the container.
9. Install grow tray
Insert the grow tray into the frame. The grow tray will lock into place. The frame fits most bins that are 8 inches in width.

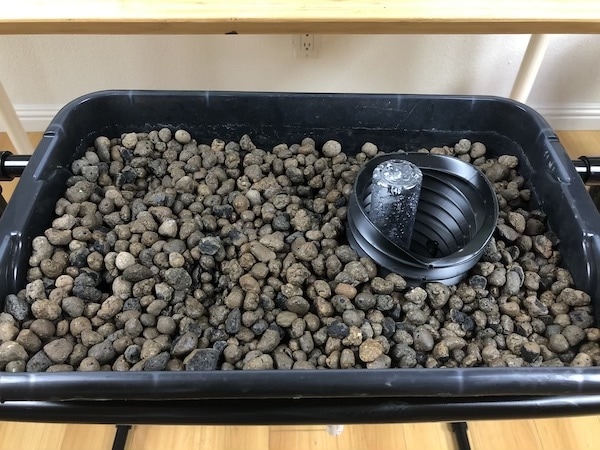
9. Wash and add hydroton
Throughly wash the hydroton until all the dust and particles are removed. Note: Hydroton dusk and particles can cloud your fish tank. Once the hydron is washed, add it to your grow container until it fills the grow container to 4 inches.
10. Add the 160 GPH pump
Connect 1/2 tubing to the pump outlet. Stick the pump to one of the inside walls of the fish tank. Route the tubing from the pump to the grow container. Clip the tubing to the side of the grow container using a clip or zip tie.
11. Hang the grow light
Hang the grow light from the screws hooks at the top of the frame.
Tip
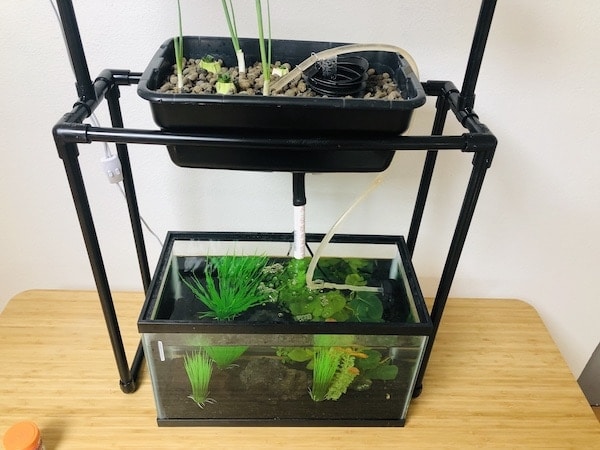
Keep the grow light 14″ away from your plants. Hanging your lights too low can burn your plants, but hanging them too high can leave them stretched and weak.12. Congrats, you are done.
You can now add your plants, sit back, and watch them grow.
Tip
- Set the light on a timer and turn it on 12 – 14 hours each day.
- If your aquarium is new, you’ll need to cycle it so that beneficial bacteria develop. These beneficial bacteria are what convert the fish waste into nitrites and nitrates for the plants.
- Calibrate your PH to 6.8 – 7.0 for optimal growth.